Monday 28 December 2015

Subframe Part 2, Steering Rack & Anti-Roll Bar Parts 1

So, Christmas has come and gone, thank goodness. I spent most of it in the garage, fiddling with my TR7. The subframe is now finished, having been painted with etch primer, stone-chip on the underside and then finished off in some lovely satin black. I'm really pleased with it.


Various bushes turned up from Rimmer Bros, which got assembled on the bonnet of the Bond Equipe (it makes a great work bench) along with the contents of a nut & bolt kit I bought some years ago. It is lovely when you can go into the shed and retrieve something you have been saving there for years, for just that purpose. The only problem is locating them, and they are usually found inside the lawn mower. Last time I tried to cut the grass, it spewed out three distributors. Only joking.

Bond Equipe work bench
I also found an anti-dive kit and spent many hours sorting bolts, washers and nuts into piles. Some of them even look similar to the ones coming off the car!

The anti-roll bar got the same treatment as everything else, i.e. rub-down, primer and satin black.
Can you spot the anti-roll bar?


The next time I write about the subframe will be when the front suspension is going on the car, I hope. Then we can talk bushes properly.

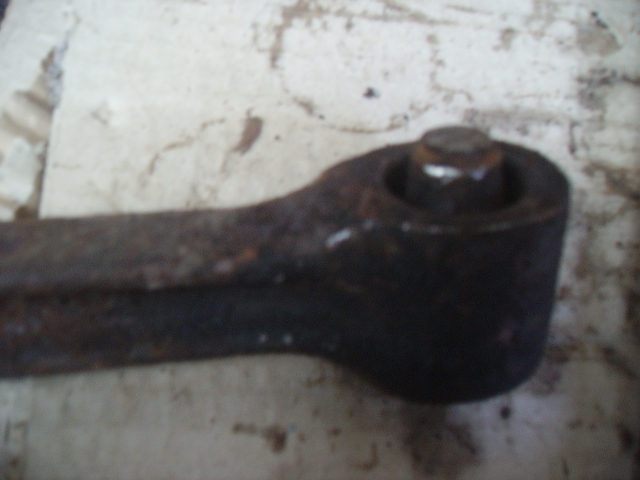
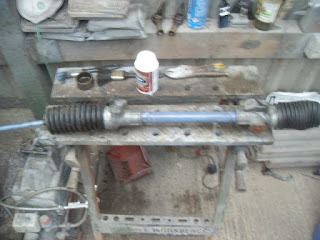
Right, onto the things fitted to the subframe. Dammit, my subframe silence didn't last long, did it? Anyway, the steering rack was given a thorough clean and its internals ignored, as when it was last driven it worked fine. Back in 1994 my mate Neil used to reckon that the car had a "quick rack" fitted, such was the precision of the steering. I have no idea if the rack is anything other than standard (the only part number I can find on it is BEX3018RH - any ideas?) but it is going back on the car as-is.

The alloy steering rack clamps cleaned up well with a wire brush and some thinners nicely removing years of muck and that weird white powder which accumulates on aluminum parts. 


A coat of etch primer and some silver paint brought them up like new. Once the rack was clean, it was stripped and cleaned in the same way, and masked up for painting. The slightly brown centre piece and the track arms got a coat of rust eater, which made them look blue for a while.
The steering rack after a good rub down
  The alloy parts were first painted in two coats of etch, followed by silver paint.
Rust eater applied

Etch primer

The bellows are being used for masking and will be replaced

Next time I'll be painting up the centre piece and track arms in satin black, ready for their new bellows and track rod ends. But that's next time.

Monday 21 December 2015

Subframe - Part 1

What do you think of my subframe? I hope you like it, as I am really pleased with it. The grotty old thing was degreased, then gone over with a flap disc in the grinder.

Incidentally, I saw one of these on ebay at the weekend, second-hand and from a dealer, at an asking price of circa £150. It was very secondhand. Isn't that astonishing? It made me think how much can be saved by re-using the car's original parts.

On a similar theme, and digressing for a moment, I want to tell you a story. Many years ago I restored a Rover 2200TC, which was a fab car. I replaced everything and improved it in every way, even down to putting in a leather interior. When it was painted it gleamed and drew envious looks. But do you know what? I couldn't bond with it after that because I had "restored out" all of its character. It had none of the original car's personality left - it was like I had erased its history and memory. It was sold within weeks of completion.

I mention that story because I learned a lesson, and am applying it to the TR7. So, for example, the subframe isn't new - it is the one that came with car and it still has some dents from where it has been jacked up in the past. Sure, when the subframe is painted it will be totally lovely, but its history will remain. All those little dings tell stories of the past, and I won't rob the car of them. The same goes for as much of the car as possible.

Anyway, once the frame was rubbed down a couple of coats of etch primer had it looking smart again. Next step is to spray it satin black, with some stone-chip on the side which faces the road.


Sunday 6 December 2015

Front Suspension Strut (4)

Long story short, the second strut all went together again fine and looks as nice as the other one.

So, onto the sub frame. It all came apart quite easily, apart from one of the track arms, which was seized into the bush's metal sleeve. Nothing for it but to cut it off with the grinder, which was quite satisfying.

It was worrying that this track arm was now scrap, but one dusty box undone a few minutes later after a quick shufty around the shed produced a brand new one. I had bought this about ten years ago for a fiver or something, and it was still in its BL box with waxy wrapping. Even better, it had the ball joint fitted.
New track arm on the right
So, next stop was to strip everything down and get it ready for a jolly good clean. The anti-roll bar and steering rack came away very easily, probably because I have been dousing the nuts and bolts in oil for the last month or so.


This is going to be another of those satisfying total repair jobs, where everything gets a coat of paint and new bushes etc. I will use the original rubber bushes, for originality's sake.
More next time!