Monday 28 January 2013
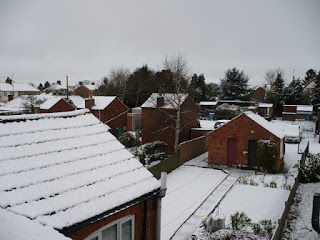
Cold!
I have to admit that there has been no progress since my last post, with the snow, ice, wind and rain having confined me to the house. Even one little job didn't get done, and that was fitting the jacking point studs to the chassis. That would have entailed drilling through the floor, meaning using a drill in the freezing garage. I opted to stay inside and watch rubbish TV.
More posts soon.
Tuesday 1 January 2013
Inner Wheel Arch - Near-side Rear
Back to work (the day job) tomorrow after the Christmas break - groan. So, today was a last minute decision to do some more repair work. Having attended to the rotten seat belt anchorage in the inner wheel arch, I was still left with some holes around the lower area. They were the type which gave me a dilemma, as the options were to repair the holes individually or just cut a big chunk of metal out and do the lot in one go. I opted for the latter.
The reason for this was that there was a clear distinction between the sound steel discovered when the panel was ground back, and the whole lower inch or so. The lower section, whilst not rotten, was just sort of "on the turn" in that grinding it just left it shiny (ish) but pitted.
So, I marked the area to be cut out and removed it courtesy of a thin cutting disc on the grinder. Any remnants of the old area where cleaned up with an attached flap disc. Such was my enthusiasm at this stage that I forgot to take a photograph of the area once the crud had been cut away. So you will have to imagine it.
On that note, the photos I did take show the repair area close-up whilst the car was on its side on the spit. Consequently you would be forgiven for not being able to make head or tail of the photos, or believing that they are actually of a different car completely, or perhaps that I had imbibed far too much lager before taking the pics. So, to help us orientate ourselves, the picture below shows in red the bit we are looking at:
Next step was to make a repair section and trim it to fit, before welding it in. I am not a very "mathematical" person and have never been any good at anything involving numbers, so I don't tend to make things by taking measurements or using science. I can plan and measure for England, but it still ends up inside out or upside down. Or both.
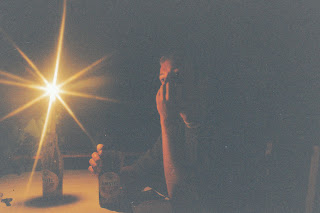
Back in 1994 when in Paxos, Greece, I got a job with a local carpenter and we were asked to make a cabinet with shelves in it. I was given the job using a sort of jig to drill the holes for the unit's shelves' locating dowels. Despite being a simple job, I still managed to use the jig upside down on one side, which meant that the finished cabinet would have been great for housing a working display of those "Slinky" springs beloved of 70s children. I was fired that day, but at least they paid my wages up until the end of the week, which I think I then spent on lots of Amstel.
The final job was to grind down the welds, and give the whole lot a quick burst of weld-through zinc-rich primer.
The reason for this was that there was a clear distinction between the sound steel discovered when the panel was ground back, and the whole lower inch or so. The lower section, whilst not rotten, was just sort of "on the turn" in that grinding it just left it shiny (ish) but pitted.
 |
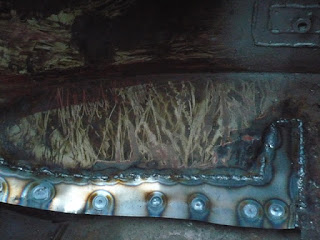
| What to do? Chop the whole lot out. You can just about see where I have scored the cut lines with the grinder. |
So, I marked the area to be cut out and removed it courtesy of a thin cutting disc on the grinder. Any remnants of the old area where cleaned up with an attached flap disc. Such was my enthusiasm at this stage that I forgot to take a photograph of the area once the crud had been cut away. So you will have to imagine it.
On that note, the photos I did take show the repair area close-up whilst the car was on its side on the spit. Consequently you would be forgiven for not being able to make head or tail of the photos, or believing that they are actually of a different car completely, or perhaps that I had imbibed far too much lager before taking the pics. So, to help us orientate ourselves, the picture below shows in red the bit we are looking at:
Next step was to make a repair section and trim it to fit, before welding it in. I am not a very "mathematical" person and have never been any good at anything involving numbers, so I don't tend to make things by taking measurements or using science. I can plan and measure for England, but it still ends up inside out or upside down. Or both.
Back in 1994 when in Paxos, Greece, I got a job with a local carpenter and we were asked to make a cabinet with shelves in it. I was given the job using a sort of jig to drill the holes for the unit's shelves' locating dowels. Despite being a simple job, I still managed to use the jig upside down on one side, which meant that the finished cabinet would have been great for housing a working display of those "Slinky" springs beloved of 70s children. I was fired that day, but at least they paid my wages up until the end of the week, which I think I then spent on lots of Amstel.
 |
| "John sat in the Greek garden and had a beer whilst contemplating his dismissal that day as a carpenter" Paxos, Greece, 1994. |
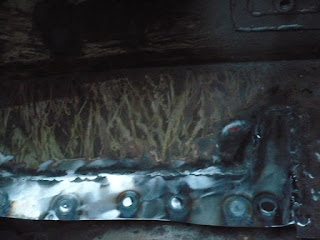
Anyway - that was then - back to the TR7. With me it is more a case of trial and error; manufacturing things on the spot to fit around the work piece. It works for me. Sort of. Once the repair panel was in place, it was just a case of carefully butt-welding it using a "light touch" on the MIG torch. The amps were turned right down but I got good strong welds. Once the stitch welding was done, I plug welded the bottom edge as per the factory.
The final job was to grind down the welds, and give the whole lot a quick burst of weld-through zinc-rich primer.
Subscribe to:
Posts (Atom)


